Friday, February 28, 2014

2 Ingredient Peanut Butter Cookies


2 Ingredient Peanut Butter Cookies

- 2 eggs

- 2 cups of peanut butter

Mix 2 eggs and the 2 cups of peanut butter. Thereafter use an electric mixer to make the batter smooth. Take the mixed in your hand, roll it in your hands until it has become a smooth and soft ping pong boll size and place it on the baking tray with some non stick baking paper. Use a fork to flatten the pong shaped cookies


Preheat oven for 5-6 minutes, then place the cookies in your oven on 180-190 degrees Celsius for 10-20 minutes depending on your oven or until the cookies are nice and firm. When you take them out you need to let them cool for about 10 minutes. Because when you let them cool they'll harden up.


Low on carbs, high in healthy fats and good amount of protein


Benefits of peanut butter


- Healthy fats

- High in potassium
- High in dietary fiber
- Good source of vitamins & minerals
- Decreased chance of developing gallstones
- Lowers chance to develop heart disease & diabetes


Breastmilk Popsicles for Teething Babies

Have you heard of "Breastmilk Popsicles"? Lots of breastfeeding moms call them "Momsicles". They are easy to make, and most babies love them.

Have you heard of "Breastmilk Popsicles"? Lots of breastfeeding moms call them "Momsicles". They are easy to make, and most babies love them.


Breast Pumping Tips for Extreme Milk Production


Since my milk came in, it has been coming and coming without hardly any let up!
When I talk to other women, I am very surprised to find that some women have issues producing enough milk. I get a lot of questions regarding what I do to keep the milk flowing. 

Here are my best tips regarding my pumping routine and what works for me to boost my quantity:

  • Pump OFTEN. I personally am either feeding OR pumping every TWO HOURS. I never skip a beat. Even at night. I pump 2-3 times throughout the night alternating with feeding.
  • I eat a ton of oats! Oatmeal, granola bars, you name it. Oats are known to boost lactation.
  • Get a good breast pump. The best out there and the one I use is the Medela Electric Double Pump. It pumps both breasts at once and is mighty powerful! It pulls all of the milk out, allowing my breasts to completely empty (a common issue).
  • When you pump, check out your technique. Do not forget to compress or squeeze your breasts. Sometimes the milk ducts get plugged. By squeezing your breasts, it helps to lure the milk out. 
  • Try warm compresses for 15 minutes before your pumping session. This will not only ensure lots of milk, but help the milk to flow easier and faster.
  • Massage your breasts to avoid cysts from forming.
  • Make sure your nursing bra is SUPPORTIVE. Most women wear the WRONG SIZE.
  • Use Bamboo nursing pads to protect your nips.
  • DRINK WATER!!! In order to make milk, you need H20! 
  • Eat a good diet with ENOUGH calories. 500 calories a day is what breastfeeding burns so EAT THEM BACK!
  • Use lanolin. This will act as a barrier and moisturizer for your nips!
  • Stock your milk. You never know when you might dry up.


A Perfect Day of Clean Eating

Clean eating


Subway Puts WHAT In Their Bread?


I came across a story recently regarding Subway in the news. Apparently, Subway has admitted to putting a chemical called azodicarbonamide-the same ingredient found in YOGA MATS. I kid you not. Since being exposed, Subway has promised to remove this toxin from its breads. And I thought the new Fritos sandwich they had was a bad idea.

This comes to show you that Subway was never healthy to begin with. There are honestly no healthy fast food chains that exist. This is why I have been and will always make my own food. I rarely eat out! I have been learning new & healthy recipes of my favorite fast foods and cooking them myself at home and it truly was one of the biggest helps to my losing 50lbs back in 2011.

You just never know what is in your food.
Scary?
Very!


Thursday, February 27, 2014

Diary of a Fit Mommy's 5 Day Total Body Workout


SIX PACK MONDAY: ABS
  1. Bicycle Crunches:
    • Lie flat on the floor with your lower back pressed to the ground and contract your core muscles.
    • With your hands gently holding your head, lift your knees to about a 45-degree angle.
    • Slowly, at first, go through a bicycle pedal motion.
    • Alternately touching your elbows to the opposite knees as you twist back and forth.
  2. Leg Lifts:
    • Lie on a flat surface with your lower back curvature pressed against the surface. Hold on to a fixed and sturdy object behind you (such as one of the beams from a squat rack) or you can just have your arms by your side with the palms facing the floor. Your feet should be straight in front of you and the upper torso should be aligned with the arms behind you holding on to the fixed object.
    • Raise your legs to where they are off the floor. This will be your starting position.
    • Raise your legs until the torso makes a 90-degree angle with the legs. Exhale as you perform this movement and hold the contraction for a second or so.
    • Go back slowly to the starting position as you breathe in.
  3. Sit Ups:
    • Lie down on the floor placing your feet either under something that will not move or by having a partner hold them. Your legs should be bent at the knees.
    • Place your hands behind your head and lock them together by clasping your fingers. This is the starting position.
    • Elevate your upper body so that it creates an imaginary V-shape with your thighs. Breathe out when performing this part of the exercise.
    • Once you feel the contraction for a second, lower your upper body back down to the starting position while inhaling.
  4. Side Plank:
    • Lie on your left side with your knees straight.
    • Prop your upper body up on your left elbow and forearm. Position your elbow under your shoulder.
    • Brace your core by contracting your abs forcefully as if you were about to be punched in the gut.
    • Raise your hips until your body forms a straight line from your ankles to your shoulders. Your head should stay in line with your body.
    • Hold this position for the prescribed amount of time while breathing deeply. That's one set.
    • Turn around so that you're lying on your right side and repeat.
  5. Russian Twists:
    • Sit on the ground with your knees bent and your heels about a foot from your butt.
    • Lean slightly back without rounding your spine at all. It is really important, and difficult, to keep your back straight, but don’t let it curve.
    • Place your arms straight out in front of you with your hands one on top of the other. Your hands should be level with the bottom of your ribcage.
    • Pull your navel to your spine and twist slowly to the left. The movement is not large and comes from the ribs rotating, not from your arms swinging. Inhale through center and rotate to the right. This completes one rep.
    • Do 16 full rotations.

ARMS WIDE OPEN TUESDAY: ARMS
  1. Tricep Dips:
    • Position your hands shoulder-width apart on a secured bench or stable chair.
    • Slide your butt off the front of the bench with your legs extended out in front of you.
    • Straighten your arms, keeping a little bend in your elbows to keep tension on your triceps and off your elbow joints.
    • Slowly bend your elbows to lower your body toward the floor until your elbows are at about a 90-degree angle. Be sure to keep your back close to the bench.
    • Once you reach the bottom of the movement, press down into the bench to straighten your elbows, returning to the starting position. This completes one rep.
    • Keep your shoulders down as you lower and raise your body. You can bend your legs to modify this exercise.
  2. Push-Ups:
    • Get into a plank position with hands planted directly under the shoulders (slightly wider than shoulder width apart). Ground the toes into the floor to stabilize the bottom half of the body. Engage the abs and back so the body is neutral. In other words, flat as a… plank (ah, now we get it!)
    • Begin to lower the body—back flat, eyes focused about three feet in front of you to keep a neutral neck—until the chest nearly touches the floor. (Note: Some experts say a push-up isn’t a push-up unless the chest actually grazes the ground). Don’t let the butt dip or stick out at any point during the move; the body should remain flat from head to toe all the way through the movement. Draw the shoulder blades back and down, while keeping the elbows tucked close to the body, so the upper arms form a 45-degree angle at the bottom of the push-up position.
    • Keeping the core engaged, exhale as you push back to the start position as explosively as possible without leaving the ground (pow!). That’s one!
  3. Plank:
    • Start off on a yoga mat in the pushup position. Starting with the pushup position is the easiest way to get into the plank.
    • Lower both your forearms to the ground so that both your elbows and fists are flat to the ground. Your palms should be balled up, and directly underneath your shoulders.
    • Curl your toes under and engage your abs by tilting your pelvis and pulling your belly button toward your spine.
    • Straighten your body but keep your neck and spine neutral. Imagine that you’re a plank of wood, and that you’re straight as an arrow.
    • Flex your abdominals and squeeze your glutes. These are the two major muscle groups you’ll be working out in this exercise.
    • Hold this position, also known as the plank, until after the burning begins. Keep your eyes on the floor in front of you. Avoid raising your behind. Your body should make a straight line from your heels to the back of your head.
  4. Arm Circles:
    • Start by standing straight with your feet shoulder width apart. Your arms should be straight out to the sides, so that your body forms a T.
    • Slowly start by making small circular motions with both arms on either side. After a few repetitions of small circles, enlarge your circles and do the same amount of reps.
    • Your end position should look the same as the start position. Breathe in and out, and release arms to the side of the body.
  5. Burpees:
    • Begin in a standing position. Your feet should be shoulder-width apart. Now, lower your body into a squatting position, placing your hands on the floor in front of you.
    • Kick your feet back so that you are in push-up position. Keep your hands firmly on the ground to support your body.
    • Lower your chest to do a push-up. Bring your chest back up.
    • Kick your feet back to their original position. Stand up, and then jump into the air while clapping your arms overhead.
    • Repeat.

LEGS FOR MILES WEDNESDAY: LEGS
  1. Calf Raises:
    • Stand on the edge of a step.
    • Stand tall with your abdominals pulled in, the balls of your feet firmly planted on the step, and your heels hanging over the edge.Rest your hands against a wall or a sturdy object for balance.
    • Raise your heels a few inches above the edge of the step so that you’re on your tiptoes.
    • Hold the position for a moment, and then lower your heels below the platform, feeling a stretch in your calf muscles.
  2. Toe Touches:
    •  Lie on your back on an exercise mat on the floor with your legs touching and fully extended and your arms extended outward with palms down.
    •  With your knees slightly bent, raise your legs straight up in the air until your feet are parallel with the floor.
    • Reach your arms toward your feet, forming a 45 degree angle. Your head should still be on the floor. This is your starting position.
    • Roll forward as you exhale, lifting your torso off the floor as you try to touch your toes with your fingers.
    • Inhale as you slowly reverse the motion back to the starting position.
    • Repeat for a complete set.
  3. High Knees:
    • In basic high knees, you need to stand still with your feet hip-width apart. Pull your right knee towards your chest and keep it there for 3 seconds. Now move it back to the original position and then repeat the step.
    • Now do the same gesture with the left knee and do several repetitions. Take 2 minutes rest between the repetitions to increase your tendency to do more repetitions.
  4. Jumping Jacks:
    • Assume an erect position, with feet together and arms at your side.
    • Slightly bend your knees, and propel yourself a few inches into the air.
    • While in air, bring your legs out to the side about shoulder width or slightly wider.
    • As you are moving your legs outward, you should raise your arms up over your head; arms should be slightly bent throughout the entire in-air movement.
    • Your feet should land shoulder width or wider as your hands meet above your head with arms slightly bent
  5. Plie Squats:
    • Stand with feet slightly wider than shoulder-width apart with toes turned out, holding lighter dumbbells vertically in front of thighs.
    • Keeping abs tight and torso tall, bend knees 90 degrees; keep knees aligned between second and third toes and weight in heels.
    • Press back to start; squeeze your glutes.

LOVE ME TENDER THURSDAY: LOVE HANDLES
  1. Oblique V-ups:
    • Lie on your left side, legs angled 30 degrees from your hips.
    • Rest your left arm on the floor and put your right hand behind your head
    • Lift your straight legs off the floor, bringing your torso toward your legs
    • Slowly return to start. That's one rep.
  2. Mountain Climbers: 
    • Start the exercise by lying face down on the floor.
    • Straighten out your arms and then touch your knees down to the ground or floor.
    • Now you are ready to lift yourself up into position. When doing this, be sure that your hands are directly under your chest at a width that is slightly more than your shoulder length distance.
    • Once you have settled into position and checked the position of your hands you should be sure to keep your legs stretched out, ensuring that they are properly lined up with the rest of your body. Pay special attention to your knees as many people tend to create a gap here but that should be avoided. If the recommended position is uncomfortable for you, it is alright to modify it slightly as long as you maintain the correct posture.
    • Now you should stretch out your left leg for stability. Bend your right knee and bring it up in the direction of your right hand. At this point, you should be in a similar position to the one you would be in if you were climbing a mountain or tree (hence the name) except horizontal instead of vertical.
    • After bringing your right knee up, return it to the original position and do the previous step with your left leg. (Once again, bend the left knee and bring it up towards the left hand mimicking the actions of a mountain climber)
  3. Side Jackknife: 
    • Lie on your left side on an exercise mat with your legs extended straight downward and the right leg on top of the left. Place your left hand on your abdominals. Place your right hand behind your head. This is your starting position.
    • Raise your right let straight in the air while simultaneously raising your torso, bringing your right elbow toward your right leg.
    •  Hold for a moment and then return to the starting position.
    • Repeat for a complete set and then switch sides.
  4. Side Plank: 
    • Lay down on your side so that only your forearm and the side of your foot are touching the ground.
    • Make your body into a straight line (side plank position).
    •  Bend at the waist and lower your hip towards the ground and then back up again.
    • Repeat for the desired amount of repetitions and then switch sides.
  5. Dumbbell Side Bends: 
    • Grasp a set of dumbbells. Stand straight up with one dumbbell in each hand, palms facing in.
    • Keep your feet firmly on the floor with a shoulder width stance.
    • Keeping your back straight and your eyes facing forwards, bend down to the right as far as you can, then back up again.
    • Without pausing at the top, bend down to the left.
    • Repeat for desired reps.

BACK THAT THING UP FRIDAY: BOOTY
  1. Squats:
    • Plant your feet flat on the ground, about shoulder-width apart.
    • Point your feet slightly outward, not straight ahead.
    • Never let your knees extend beyond your toes.
    • Look straight ahead. Bend at your knees as if you were going to sit back in a chair, keeping your heels on the floor.
    • Pull in your abs, and keep your lower back in a near neutral position (a slightly arched back might be unavoidable).
    • Tighten your whole body when you perform the squat.
    • Lower yourself. In a controlled manner slowly lower yourself down and back so that your upper legs are nearly parallel with the floor. Extend your arms for balance.
    • Keep the upper body tight at all times.
  2. Butt Kicks:
    • Start on all fours, with your hands directly under your shoulders and your knees directly under your hips.
    • Keep your right knee at a 90-degree angle as you slowly raise your leg behind you until your thigh is almost parallel to the floor. Pulse your flexed foot toward the ceiling by squeezing your glutes. Your back should remain perfectly still in a neutral spine. The motion should be small and controlled with the muscle doing the work and not momentum.
    • Return to start position to complete one rep.
  3. Lunges:
    • Stand up straight, with your legs hip-width apart. Place your hands on your hips. Flex your abdominal muscles inward and upward.
    • Step forward with your right foot approximately 2 or 3 feet (0.6 to 0.9m). The taller you are, the further you will need to step forward. Keep your back straight as your body moves forward.
    • Lift your left foot up slightly, so that the toe is in contact with the floor, but your heel is not.
    • Bend both of your knees at the same time. The aim is to make both of your knees stop at a 90 degree angle. Make sure your right knee does not go over your toe line.
    • Pause in this position for 1 to 5 seconds. Stopping your forward momentum will help you to put more effort into rising from the lunge.
    • Push off of your right heel to rise. Return your right leg to its starting position.
    • Repeat with the left leg.
  4. Wall Sit:
    • Stand in front of a wall (about 2 feet in front of it) and lean against it.
    • Slide down until your knees are at about 90-degree angles and hold, keeping the abs contracted, for 20-60 seconds.
    • Come back to start and repeat, holding the squat at different angles to work the lower body in different ways.
  5. Side Lunges:
    • Stand with your feet set about twice shoulder width apart, your feet facing straight ahead.
    • Clasp your hands in front your chest.
    • Shift your weight over to your right leg as you push your hips backward and lower your body by dropping your hips and bending your knees.
    • Your lower right leg should remain nearly perpendicular to the floor.
    • Your left foot should remain flat on the floor.
    • Without raising yourself back up to a standing position, reverse the movement to the left. Alternate back and forth.
Want to build a better body in just 12 weeks? Check out my Fit Mommy Workout Bundle!
Bundle & Save BIG!

In this bundle, you will receive:
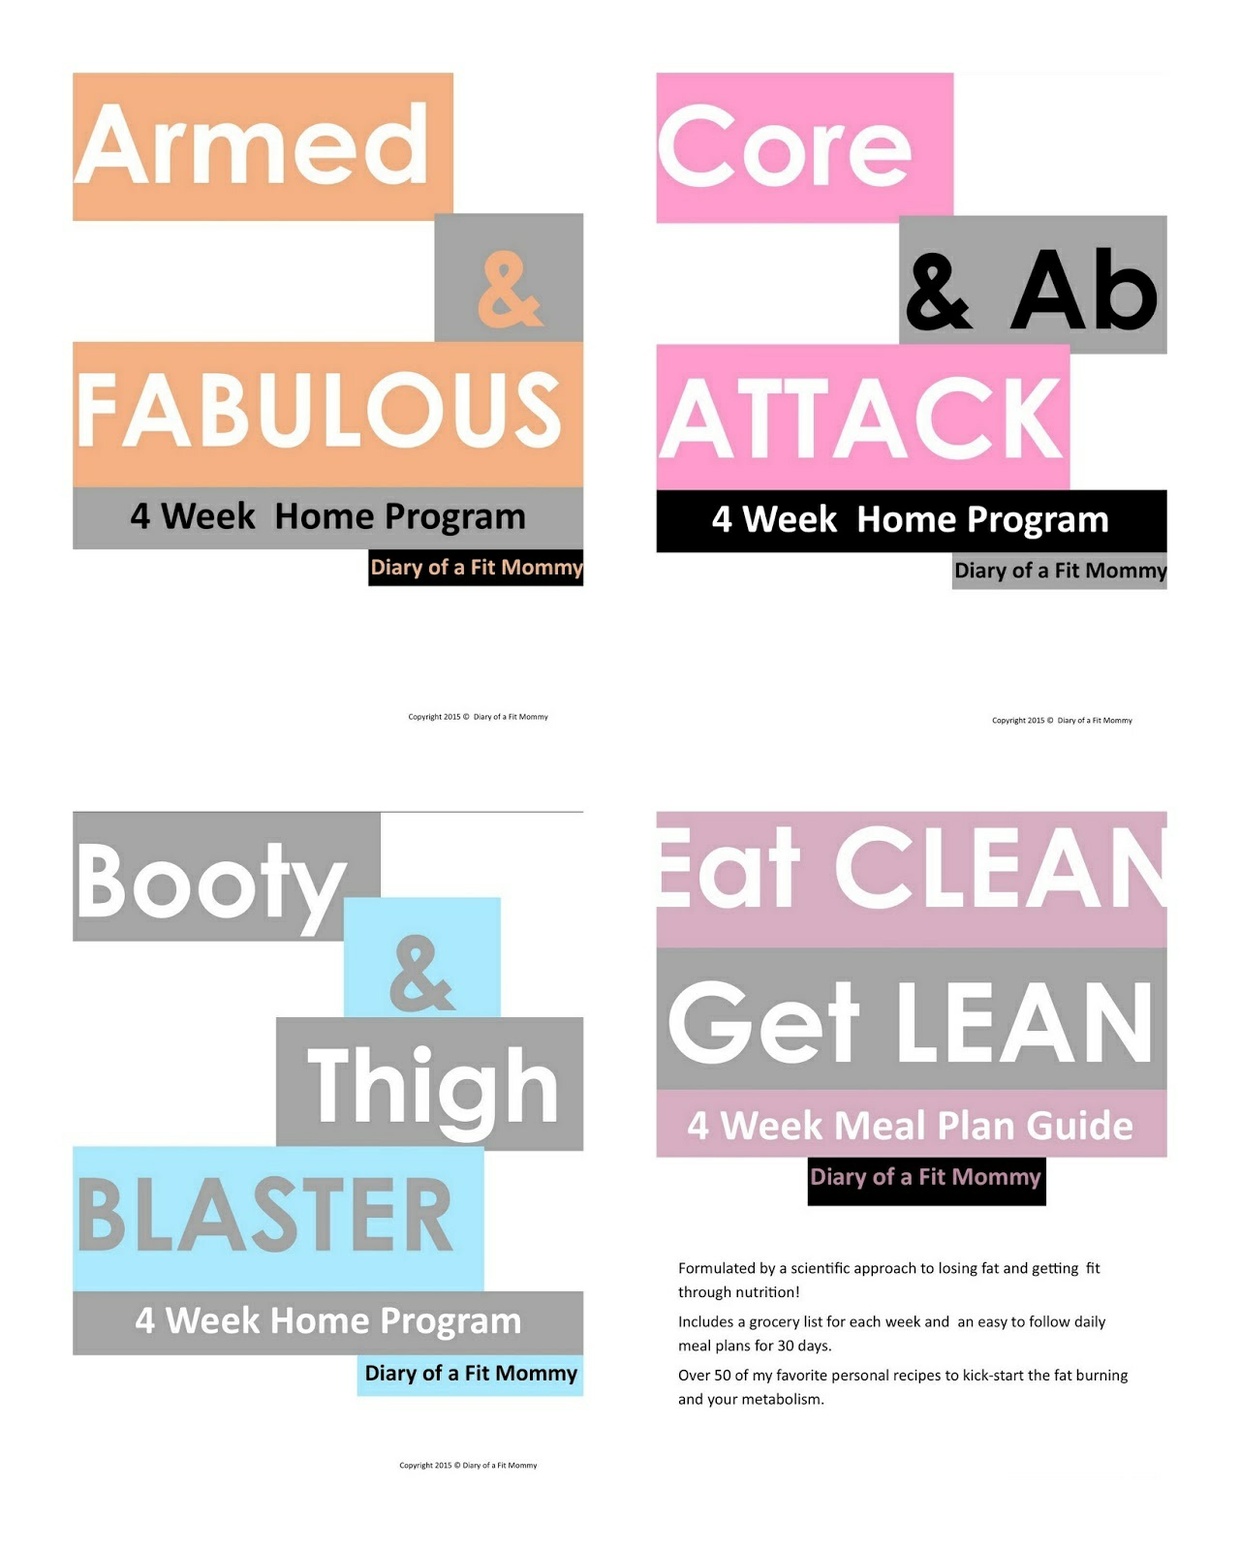
-Butt & Thigh Blaster 4 Week Home Workout Program
-Armed & Fabulous 4 Week Home Program 
-Ab & Core Attach 4 Week Home Program
-Eat Clean, Get Lean 4 Week Meal Plan

All programs are bodyweight exercises only-NO GYM REQUIRED! You can simply do these at home within the comfort of your own home. 
Features 4 weeks of high-resolution step-by-step pictures and an exercise directory.
*The Armed & Fabulous program does require one set of dumbbells only.

Jumpstart your weightloss with this 4 week clean eating meal plan! With over 60 easy-to-make recipes, you are sure to enjoy the world of clean eating while losing those few extra pounds.

"Can I do all 3 workout programs together?" Absolutely! You can actually alternate them and do your butt program one day, arms the next, and then abs. Then start over! 


Thirsty Thursday: ChocoPeanutBerry Smoothie

My Super Duper Shake  1 Scoop Unsweetened Vanilla Almond Milk 1 Scoop Chocolate Whey Protein Powder 1 Scoop Amazing Grass - Green Superfood (Chocolate) 1/4 Cup Frozen Blueberries 1 TB Natural Peanut Butter  1 Cup of Ice Blend and Enjoy! =)

Filled with antioxidants and protein. A great post workout shake.

Ingredients:
 3/4 cup Unsweetened Vanilla Almond Milk
 1 Scoop Chocolate Whey Protein Powder
  1/4 Cup Frozen Blueberries 
1 TB Natural Peanut Butter
 1 Cup of Ice

Blend and enjoy!


Wednesday, February 26, 2014

Guest Blogger Micky Marie Morrison from BabyWeightTv

Getting Back into the Fitness Groove after Baby 

"Whether you were a fitness fiend or phobe during pregnancy, getting back into a fitness routine can be tough for new moms. Juggling the demands of a new baby with the responsibilities of a functional adult on little-to-no sleep is challenging enough. Finding time and energy to exercise may seem impossible. But the motivation of getting out of maternity clothes and back into blue jeans is enough to make you at least think about getting moving.

A few tips for the mom trying to get back into fitness after baby:

1. A Little While Can Make a Big Difference-  Don't think that you have to set aside a solid hour to get in a good workout or you will never do it. Take what you can get, when you can get it. If what you have time for is 5 minutes of jumping jacks and push ups before you rush into the shower during baby's very short morning nap, do it and feel proud of your effort! If you can grab a few of those 5-7 minute periods throughout the day, you will see and feel a big difference in a short time. Every little bit counts!

2. Use your Baby Weight to Lose Your Baby Weight- Add your baby's weight as resistance to your exercises.Put your baby in a front carrier and go for a brisk walk around the block or walk the stairs in your house. Hold your baby while doing squats and core exercises, doing a chest press with baby to really kick it up a notch to tone the upper body while working the legs and core. As baby's weight increases, so does the resistance to the exercises so you continue to grow stronger! And bonding with your baby makes the exercise more fun and less like a chore. 

3. Find Fit Friends- Search for meet up groups and Community groups to help you connect with other new moms in your area. Many groups organize fitness classes in local parks. Try to find baby-and-me classes to take your baby to meet other moms and babies. Or make your own class: invite a friend over for a brisk walk around the block followed by a set of squats and core exercises with your baby. 

4. Do it Daily- Even if you have time for just a few minutes a day, do something physically active every day. It helps keep your endorphin levels up to fend off the baby blues and keeps you in the habit of moving. 

Be consistent and the results will be continuous!"

Micky Marie Morrison is the owner of BabyWeightTv; online fitness classes for Moms & Moms-to-be. Visit her at http://www.babyweightfitness.com/

Inline image 2
Inline image 1


Workout Wednesday: Reverse Fly

Toning your upper back and shoulders. All you need is a set of dumbbells and a sturdy place to sit.

This arm toning move from FitSugar will leave your upper back & shoulders looking sexy in your next strapless dress!

To find out how to do this exercise, read more.
  • Sit on a chair or the end of a bench.
  • Place a light dumbbell in each hand and lean over your thighs. Don't collapse onto your legs, but keep your chest about six inches from your quads. Try to straighten your spine and engage your abs.
  • Now at the same time, lift both arms up, drawing your elbows back and squeezing your shoulder blades together. Then with control, lower the dumbbells back toward the ground.
  • Do three sets of 12 to 15 reps.


Baked Avocado & Egg Cups

My Paleo breakfast this morning. Baked Avocado & Egg Bowls! Very simple. Take the pit out of the avocado. Crack an egg (I used egg whites only) and pour into the center of the avocado. Bake at 350 degrees for 10 minutes while baking one strip of bacon in the oven as well. Top with crumbled bacon. Enjoy! #Paleolife


Tuesday, February 25, 2014

Come Visit Our Facebook Group!

Hi ladies! I have created a new group on Facebook for you guys to join. If you already follow my official Facebook page {https://www.facebook.com/Fitmommydiaries}, then you already know about this! The group is called Fit Mommy Diaries and you can stop by and add yourself here: {https://www.facebook.com/groups/fitmommydiaries/}

The group is about empowering each other & supporting each other as women through diet, fitness, pregnancy, postpartum-no matter what our life goals are!

 Feel free to introduce yourself and to share recipes, your workouts, your goals, and to even ask questions or seek support!

Hope to see you soon! :)

Sia


Bamboobies Washable Nursing Pads Review + $25 GIVEAWAY + 20% Off Coupon Code!


Hello, breastfeeding mamas!
Today, I introduce you to Bamboobies! This is a very popular company that sells the CUTEST reusable/washable breast pads to use while breastfeeding. Their nursing pads are top of the line and made of super absorbent Bamboo. They are also less visable through your t-shirt than the leading disposable breast pads-an issue I had when wearing disposables. I had the chance of reviewing the regular & overnight pads.

The regular pads are the heart shaped ones that you have probably seen floating around the internet. They are just the CUTEST! They come in a 12 pack for $39.99-not bad at all since you will be reusing them!

The overnight pads are the circular, blue ones. These run for about $29.99 for 8 pads and will guarantee that you will not leak through the night as the hemp core locks in milk!


You can also get a combo pack which includes both regular and overnight pads. 

Chart

The initial cost of Bamboobies might make you want to turn to disposables, but this is just a one time initial investment-just like cloth diapers for newborns! Take great care of them and they will last forever! Check out the price comparisons below.


You might be wondering how many you will need. It all depends on your milk flow but to be safe, Bamboobies recommends at least 2 pairs of regular pads daily and 1-2 pairs of overnight pads nightly. Upon putting the pads on, I was very happy to feel how soft they were. This convinced me to never want to buy disposables again! I wore one set of regular pads throughout the day and did NOT leak through. I tested the overnight pads and only had to go through one pair-and I leak A LOT. But, again, I did not leak through. Not only are these pads soft & cute-they do some justice.


I also had the chance to review Bamboobies sleep nursing/maternity bra!
YES! They do make nursing bras and nursing shawls!
This bra was super comfortable-I enjoyed it a lot better than my Basics by Bravado sleep bra that I bought from Target. The design in the front is also very pretty (though they make ones without the designs if you are not wanting one on there.) It held me up perfect and my Bamboobies fit perfectly inside.

**ALSO! When you buy any bra from Bamboobies, if you save the tag that comes onto the bra and mail it to the address listed on the tag, you get a FREE PAIR of Bamboobies regular pads! Cool, right?**


(Back view)

Be sure to enter the giveaway below for $25 credit towards your purchase on http://www.buybamboobies.com/ !
*** PLEASE NOTE: WINNER IS RESPONSIBLE FOR SHIPPING ($4.95)***

a Rafflecopter giveaway

Here is an exclusive coupon code just for you for 20% off their whole site!
Use code FITMOM20OFF at http://www.buybamboobies.com/ when you checkout

To learn more about Bamboobies or to view their product line, visit:


Try It Tuesday: Evening Primrose Oil


I am sure you ladies have heard of Evening Primrose Oil during pregnancy! It is said to help induce labor when you are nearing your due date or overdue. It is also known for preventing pre-eclampsia, shortens labor, and prevents you from being overdue. To use during pregnancy, you are supposed to insert a capsule inside the vagina, near the cervix, as a suppository to help ripen it. Other women choose to take the oil orally. Another great thing about Evening Primrose Oil is that it is said to help speed postpartum recovery!

Did anyone try Evening Primrose Oil during pregnancy?
I personally did not, but had been curious! I have used it for PMS symptoms. Very good stuff!


Monday, February 24, 2014

Simple Move to Combat Love Handles

6 moves to lose your love handles. i stopped doing this one way back when because i was embarrassed to look like a beached fish, but now i'm more embarrassed of my love handles than what marine life my 10 month old might think i look like. cause let's face it; who else is going to see me working out?


Lansinoh Breastfeeding 3-in-1 TheraPearl, Soothies, and Travel KitReview

Hi ladies! To those of you who breastfeed, I have a great review for you regarding some awesome products to help make your life a LOT easier!

I have teamed up with the popular company Lansinohsinoh to bring you a review of their 3-in-1 Therapearl Breast Therapy, Soothies Gel Pads, and their Breastfeeding Care Traveling Kit.


The first product I tried were the Soothies Gel Pads. You pop these babies in the refrigerator, let them chill, and apply them to your nipples whenever they are feeling sore or irritated. I personally use these after each feeding. What's great is that each gel pad can be used for up to 72 hours! Upon trying them on, they felt cool and immediately there was relief! It was such a nice feeling. The gel like material sticks to your skin, so you do not have to worry about them moving around. I really enjoyed these.


The next product I tried was the 3-in-1 Therapearl Breast Therapy.
Whats fantastic about this product is that you can heat it in the microwave to warm it up OR you can pop them into the refrigerator to use as chilled. I personally warm them up prior to pumping and then I apply them during the pumping session. The heat really opens up your ducts and allows the milk to flow faster and easier. When I chill them, I apply them immediately after each feeding or pumping. They are also nice on engorged breasts (first thing in the morning!).


The next product that I tried was the Travel Kit bundle. This cute little kit features breast pads, Lanolin, baby wipes, milk storage bags, and a cute little travel bag to store the products in. The bags are the best storage bags I have found! The Medela ones do not freeze flat, but these do!! The lanolin is great and really moisturizes dry and cracked nipples. The nursing pads are great quality-you open them, attach the adhesive side to the inside of your bra, and go! The baby wipes are possibly my new favorite wipes on the market. Love the smell-it is not too overbearing.


Overall, I was so excited to try Lanisoh products and I was very impressed. So happy to have some breast relief! Thank you, Lanisoh!

To check out Lanisoh and to view their entire product line, visit their:

Disclaimer: I was given Lanisoh products to test, at no cost. All opinions are my own.


3 Day Military Diet


A few of you have written me regarding the "3 Day Military Diet" and what I personally thought about it. This diet is meant to be 3 days only (hence, the title lol). It is pretty extreme and promises that you can lose up to 10lbs in 3 days, but that is how its meant to be. This diet is specifically for slimming down quickly within a short amount of time for an event. It could be for a wedding, swimsuit competition, fitness test, or to get in shape for the military-you name it! Whatever your reasoning is, please do not follow this diet for longer than it is recommended. This is not a lifestyle but a fast fix-it is more of a fast, not an actual diet.

 Do not expect the weight that you lose to stay off.
Remember, true weightloss takes time. 

Again, this is great for when you are needing to slim down and de-bloat for an event. It really does work!

However, always consult your doctor before beginning any exercise routine or diet plan.

Here is a sample of day one:

Military Diet Plan Breakfast Day 1
Source: http://themilitarydiet.com/

Military Diet Plan Day 1 Lunch
Source: http://themilitarydiet.com/

Military Diet Plan Day 1 Dinner
Source: http://themilitarydiet.com/

All 3 days can be found on the Military Diet Plan's website. 
To view the diet plan itself, click here.

For a healthier, long term weightloss routine, try my easy home workout plan bundle to tone your arms, booty, thighs, and abs in just 12 weeks. Also included is an easy, clean meal plan to start you off with success!

12 Week Workout Program + 4 Week Meal Plan Bundle


Motivational Monday: Rhyanna Watson

Good morning ladies!

Today, I have Rhyanna Watson on the blog for Motivational Monday to tell her story of staying fit during pregnancy-and after! She is truly an inspiration!


I am grateful for all my challenges... for after each one that I overcame, I became stronger and more able to meet those that were still to come...The only person you are destined to become is the person you decide to become.....

These are four photos taken over the last 2 years a journey from fit to pregnant to fit again. When I was fit I could not imagine being pregnant and when I was pregnant I could not imagine being fit and strong again. The first one was taken about 3 months before I found out I was pregnant; the second shot is 29 weeks pregnant, the third shot is 2.5 weeks after giving birth and the last shot is 7 months after giving birth and back fitter than ever with a beautiful side kick Laine and amazing family. 

Pregnancy was not easy for me. I was not gym active after 5 months except walking and in time walking was a challenge; however life is not about the destination it is about the journey and enjoying the ride. We as individuals must have the courage to continue and the faith and belief in our goals always.


Success in life comes when you simply refuse to give up, with goals so strong, that obstacles, failure and loss only act as motivational.

I believe that impossible stands for I'm possible. If you believe, you will Achieve. 

I wanted to prove to people that fitness is a way of life and it isn't a fad. What you put into your life you reap the rewards from. 

I have no nanny or family at my door step to help. I workout mainly at home, body weight exercises 4 to 5 times a week for 30 to 60 mins. Anyone can do this you just have to want it and make your desire stronger than your excuses. 

In life you don't always get what you wait for, but you always get what you work for. 

Comparing yourself to others is a worthless cause. While competition can provide for some solid motivation every now and then, the truth is your only competition is you. 


I used to believe that in order to be successful I had to be like everyone else. But as we all know that won’t get you anywhere. While it’s perfectly acceptable to have role models, it is essential for you to be authentic and true.

Give yourself permission to take control. Realize that you are 100 percent responsible for your current reality.

Stop wasting your precious time worrying about what’s going on around you and instead put all your energy and focus towards creating a better you. Create instead of complaining. Build instead of destroy.

Dare to experiment. Dare to explore.

Your only competition is you!


You can follow Rhyanna Watson at her Facebook page: https://www.facebook.com/writethefutureyesterdayyousaidtomorrow?ref=hl 

**If you have a motivational story to tell and would like to be featured on our Motivational Mondays, please send me an email with your story, along with a few photos!**


Sunday, February 23, 2014

Real Cup Coffee Review


Who loves coffee?
I do, I do!

I had the chance to review Real Cup single serve cups recently. I had never heard of this brand coffee before, but I am was so excited when the company reached out to me regarding their awesome brand.
Upon receiving the box, I was blown away by how professional and nice the box itself looked!


When I opened the black box, I saw all of these little tubes that contained the coffee. It was a very nice presentation, so I could only imagine what their coffee would taste like! Inside each tube, cleverly labeled "Flavored coffee, "Light Roast coffee", "Medium Roast coffee", "Dark Roast coffee", and "Teas" I did not know what to try first so... I opened them all! :)


I was pleased to find many different brands within the tubes including my all time favorite Marley coffee!! Other brands include Martinson, Brown Gold, Higgins & Burke, & Second Cup. I was pleased with each flavor-I personally loved the Marley coffee and ALL of the flavored coffees. My husband favored the Dark Roast. I was so happy to be able to have a new favorite coffee to start my morning in my Keurig. Overall, I was impressed by Real Cup

To check out Real Cup coffee, visit their:

Disclaimer: I was given Real Cup coffee to test, at no cost. All opinions are my own.


10 Things You Can Do to Easily Breastfeed in Public


Hi ladies! I have an awesome post to bring you from guest blogger Syed Shaffizan from pregnancybodypillow.org . Below, she discusses ways that you can easily breastfeed in public. I know that when I am out and about and Grey gets hungry, I immediately panic! Here are some great tips that you can abide by next time you are stuck in this bind.

10 Things That You Can Do To Easily Breastfeed In Public

Breast milk is the perfect food for nature as it holds all the essential nutrients your baby needs. It as well shields your kid against infections since it holds antibodies for the illnesses that the mother has already faced. There’re a lot of studies explaining that breastfeeding considerably minimizes the risk of experiencing stomach upsets and pneumonia during the first few years of the baby. Breastfeeding is a good way to provide proper nutrition to your child. It as well enables the mother and child to create a bond that’s unlike anything else.
The expediency of breastfeeding adds to nursing appeal too. Rather than setting up formula for a hungry baby, the mother is in a position to give her baby her breast. Additionally, unlike formula, mom’s milk is at all times at the right temperature and the newborn will at all times receive the correct amount. Fiscally, you can save hundreds of dollars by not buying formula.
However, home baby nursing is a little more different from public breastfeeding. For some moms, especially first timers, the public breastfeeding challenge can be intimidating. Even if you have perfected the best nursing method at home, some breastfeeding tips may be required to make sure that public breastfeeding goes out effortlessly and contentedly for the mom and child.

1. Wear the Right Clothes: You and Your Baby
Wear the right top when breastfeeding in public. You may choose to buy special nursing shirts that are designed particularly for nursing mothers. These shirts have folds or openings on the side to enable you to nurse discretely without problems, or even try putting on a button-down top that enables you to undo the buttons from the bottom, and this enables you to decide how much skin you want to show. You can at all times cover up any skin that is exposed with a receiving blanket if your baby bears anything over his/her face. Make your clothing lose for comfortabliity.

2. Take someone with you
Sometimes, it’s very crucial to be accompanied by a friend who has an older kid and can take you to places that she knows are comfortable for a mom to sit and feed. Or may be pick someone else, for instance your partner, mum, or sister so that there is someone to talk to you at all times.

3. Plan ahead
Ensure that you do not wait till your baby starts crying of hunger. By planning ahead and setting up a feeding time, you will get settled and begin to nurse without feeling stressed out or weighed down with a crying baby.

4. Bras, Pads and Clothing
Nursing brassieres are nowadays available on the market. They’re made in a way that you will gain comfortable access to the breasts without having to remove your bras. Additionally, circular pads are available in both washable and disposables. They’re not essential, but they can turn out to be very obliging since sometimes, when you aren’t expecting, milk may express itself and wet your shirt.
For clothes consider wearing a 2-piece, to acquire easy access. Clothes with buttons are very helpful.

5. Blanket
Walk with a baby blanket that will be used to cover the body part that’ll be exposed. This will make you relax causing milk to flow and the baby to calm down and you’ll be in a position to nurse comfortably. Using a blanket also helps to put at ease people that are around you.

6. Quite Place 
Whenever it’s possible, find a quiet place to breastfeed and don’t forget to support your back.

7. Baby slings carves and clothes
Some baby slings are designed in way that it’s possible to breastfeed whilst your baby is still in the sling. Gather more info from your health officer. Some moms prefer or feel contented when they lay a scarf or a Muslim cloth over their chest as they breastfeed. 

8. Avoid the Loos
Do not feel that you need to sit in a public toilet to breastfeed. You would not eat in there, so do not feel that you kid should.

9. Practice
Consider practicing in front of the mirror so that you that you can get the feeling of maneuvering your baby when breastfeeding without exposing a lot of yourself. With a little practice it becomes easier and you are in a position to do it without you or your baby being frustrated

10. Know Your Rights
You should not ever feel uncomfortable about breastfeeding in public. Actually, the Equality Act 2010 has claimed it illegal for anyone to ask a breastfeeding mom to leave a public place, like a shop, café or public transport.


Saturday, February 22, 2014

My First Time Experience With Cloth Diaper


This starts my official stream of cloth diapering posts,  reviews, and giveaways (YAY)! 

I am so excited to be able to review different brands for you ladies who are interested in cloth diapering as well as sharing my first time experiences as a cloth diapering mommy.

This is my first time cloth diapering as I'm a total newbie. I was so overwhelmed in the beginning because there were so many different types of cloth diapers as well as brands of them! I not only wanted to know how to cloth diaper in itself, but also which brands to stock my supply on. I had so many questions and wanted to know which pail to use, what detergent, and how on earth to wash them!

I did my research and have done a few tests on my son and I've got to say-cloth diapers are the cutest thing! He did well on them and so we will begin full time cloth diapering tomorrow. 

I had Grey in disposable diapers for the first two and a half weeks of his life and I experienced:

*rash
*blowouts
*yeast
*redness/irritation
*patchy red, bleeding spot on his scrotum

I then said to hell with disposables and immediately tried on the long awaited cloth diapers to see if he would improve. Sure enough, the rash, redness, irritation, red spot went AWAY-GONE! Kaput! Not to mention, NO BLOWOUTS! 

It's amazing how harmful the chemicals in disposable diapers truly are. Yuck. The only reason why I started him out in them is because we got so many at our baby showers and he was a little too small at the time for the one sized cloth diapers I have. 

Which cloth diaper did you decide to stock up on? We decided to go with mainly All in Ones or Pocket Diapers. These are the type you stuff with inserts. They tend to be pricey, but they're so easy. 

So, how do you change them? The changing routine with these are to wash the diaper cover with a sprayer, remove the liner, and rinse it.Then wring it out a bit, leaving it damp, and toss into your wet or dry diaper pail.

What diaper sprayer do you use? While special diaper sprayers out there cost you about $60, I simply bought a long stretchable shower head sprayer to use instead for only $20! 

Which diaper pail do you use? Well, based on my numerous conversations with mommies-I don't use a pail! Instead, I'm using a laundry basket. 

Wait-doesn't that stink? Nope! Keeping diapers in a sealed pail is what stinks. Also, by using a laundry basket, I saved a good bit of money and worry. 

What's your washing routine and which detergent do you use? I use Tide Originak Powder. It's the best thing out there and you can get it from any store so you don't have to worry about purchasing online and waiting for your special shipments to arrive. Don't get me wrong-there are special detergents out there that are great for cloth diapering. But why not use what you know works AND save a buck!

My washing routine is simple:

1) Pre-rinse on cold without detergent, this helps get the gunk off.

2) Wash on hot cycle with detergent.

3) Do another rinse cycle.

4) Tumble liners/inserts on low in the dryer and hang the diaper covers to dry. Yup! Bought me a clothesline and some pins. It's going down!!

And that's all folks.

But how do you prep your new diapers?
For new cloth diapers, you must prep them to rid them of the factory chemicals so they do not irritate baby. How you prep them depends on the inserts/liners you have. 

Micro fleece, microfiber, or anything synthetic: wash 3 times with detergent on hot. Diaper covers only need to be washed once.

Organic cotton, bamboo, hemp, or any natural material: these must be washed up to 5-6 times on hot due to the natural oils. ***never prep these with synthetics-the oils will clog the pores of your synthetic inserts, making absorbency less*** Diaper covers only need to be washed once.

I plan on washing every two days since I have about 50 diapers or so. It's best to not go longer or they will develop a funk to them.

Good luck cloth diapering and I will be sharing my updates and cloth diaper reviews soon!

Sia


Related Posts Plugin for WordPress, Blogger...
>